This blog is hosted using Ghost, a NodeJS based content management system. It is composed of three containers - the backend, the database and the proxy.
The proxy frontend will be handled with Caddy. Caddy is a very elegent web server, with a sucicent configuration syntax, automatic LetsEncrypt, and security focused default settings.
This post is a refinement of Setting up Ghost 2.0 With Cloudflare (November 24th, 2018)
Copying the volumes
All the persistent data on the old server is stored in docker volumes, which are directories on the local file system. First, shutdown the containers with docker-compose down and scp. The main working directory will be /srv/etherarp
Creating the new Docker compose file
This docker-compose file defines the three containers, db, www, ghost. The Ghost and Mariadb backend containers are in an internal-only network, while the Caddy frontend has two networks, internal and external.
Variables (in the form of ${vars}) are sourced from /srv/etherarp.net/.env. This contains the SQL credentials, SSL certificate paths, and external address bindings. The Docker host will host a number of origin servers, so each web facing container is bound to its own specific IPv6 address. Public access is provided through Cloudflare.
Configuring the Caddyfile
Configuring a systemd service
The stack can be controlled as a service using systemd. The systemd unit creates and destroys the IPv6 addresses, and calls Docker-compose. The preferred_lft 0 option is used when adding the address to prevent it being used as a default source address.
Firewall
Next, firewalld needs to be configured to allow access to https from the Cloudflare edge. This is achieved with the above script. To allow public https access for a different address, the following firewalld rich rule can be used.
firewall-cmd --add-rich-rule \
"rule family=ipv6 port
protocol=tcp port=443
destination address=$addr
accept"
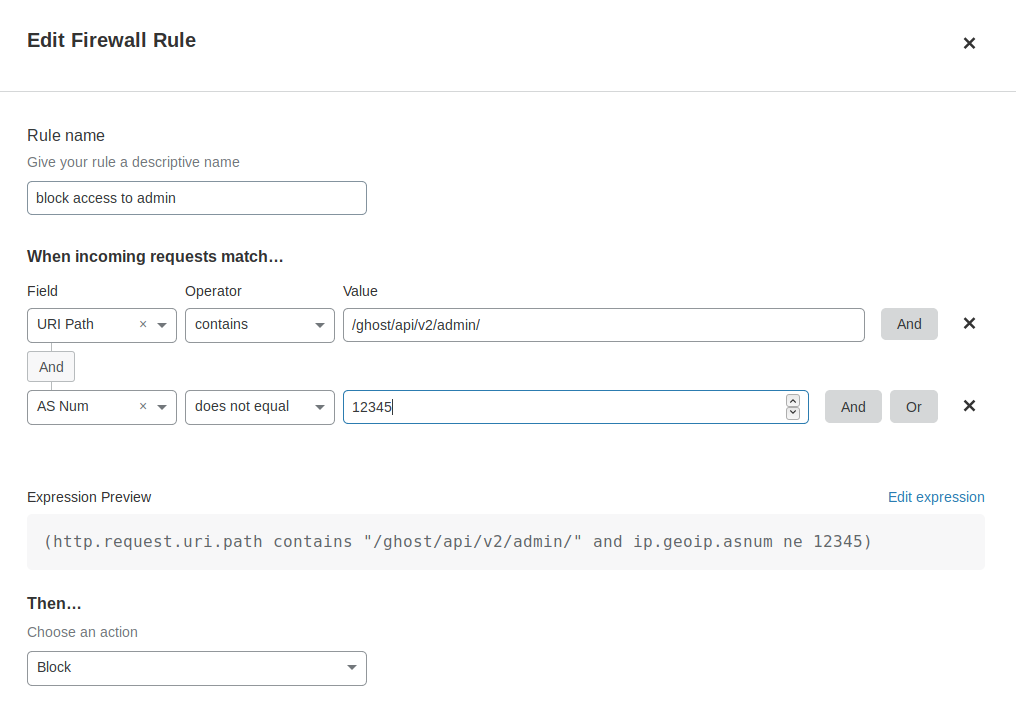
I also add and remove additional rules to tightly restrict both in and outbound traffic. This is done both on the system and via the cloud provider console. On the topic of firewalls, it's a good time to check the Cloudflare settings for the site. I make sure the admin interface/API isn't accessible to the public internet
Wrapping up
At this point, all that's left to do is run systemctl start etherarp.service; systemctl enable etherarp.service.
To check it's working, we can run curl --resolve etherarp.net:[$ip6addr] https://etherarp.net.
Once the local instance is tested and working, it's time for the moment of truth, via Cloudflare, the DNS records are changed to the new server. If you're able to read this post, it means everything went smoothly.